“How do I rotate my pages to landscape orientation and adjust my page numbers?”
The first step in rotating pages is to isolate the pages in question. This is done by creating section breaks. By doing this, the pages to be rotated will not affect the two sections immediately preceding or following it.
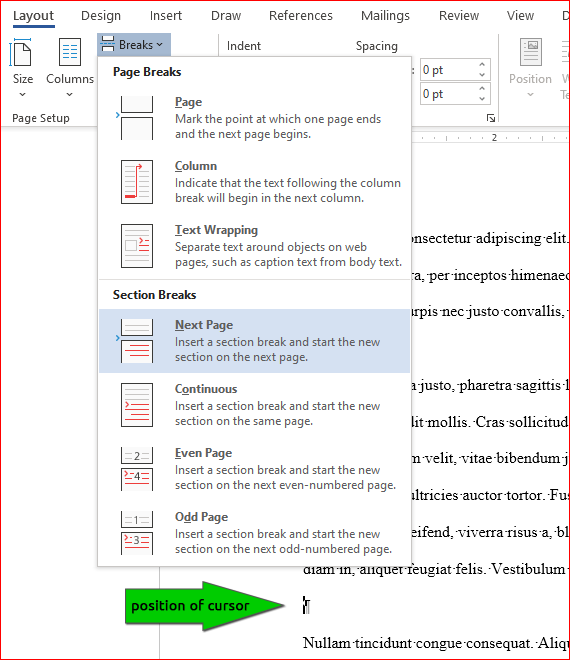
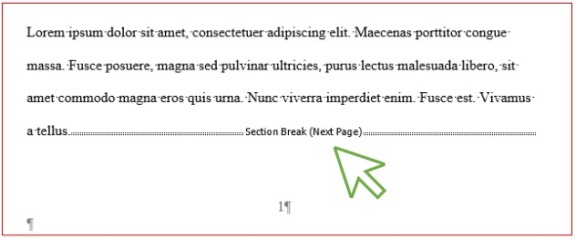
Step 1) Create section breaks.
To rotate pages to landscape orientation, you will need to create two breaks: one on the page that precedes the pages to be rotated, and one on the page (or the last of multiple pages) that will be rotated.
Place your cursor at the end of the text that is on the preceding page of the one to rotated. Follow directions below.
Then place your cursor at the end of the text on the last page that will be rotated. Follow directions below.
Most of the time, you'll want to choose Next Page. This will ensure that pagination continues sequentially across sections. (Remember to follow directions and do this again at the end of text.)
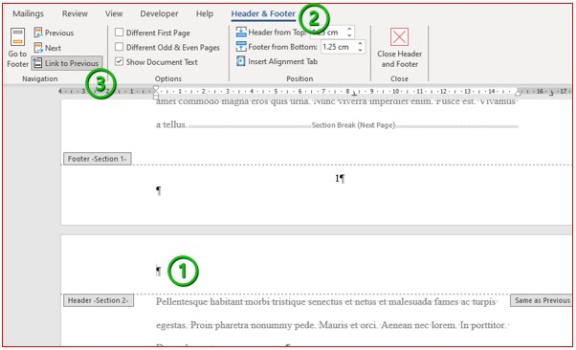
Step 2) Unlink the sections from one another, isolating the section to be rotated.
This should happen four times, twice for headers and twice for footers.
Double-click the header on the first page to be rotated > Header & Footer Tools ribbon menu > Navigation group > Deactivate the Link to Previous toggle (so that it is not highlighted)
Now do the same on the first page immediately following the one(s) to be rotated:
Click on the header on the first page after the last one rotated > Header & Footer Tools ribbon menu > Navigation group > Deactivate the Link to Previous toggle (so that it is not highlighted)
Click on the footer on the first page after the last one rotated > Header & Footer Tools ribbon menu > Navigation group > Deactivate the Link to Previous toggle (so that it is not highlighted)
This isolates the sections by allowing running elements to be modified independently of proceeding and following elements. This will allow you to remove page numbers before you rotate your page without affecting the page numbers on other pages and sections.
Step 3) Remove the page numbers from the pages to be rotated.
Page numbers will be re-inserted after page rotation.
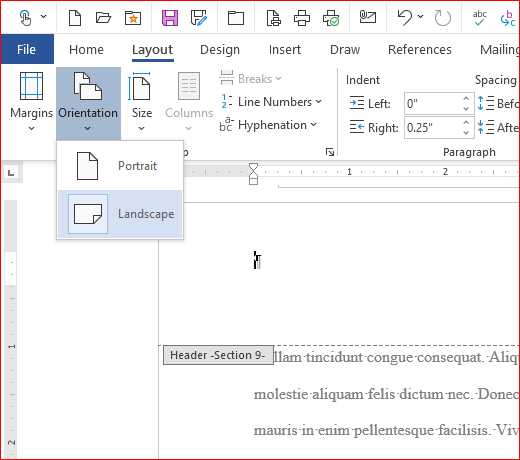
Step 4) Rotate the section of pages from portrait to landscape.
Margins should adapt to the page rotation with the 1.5" margin now on top and all other margins 1" (bottom, left, and right).
Place your cursor on the first of the pages to be rotated, then:
Step 5) Re-insert your page numbers.
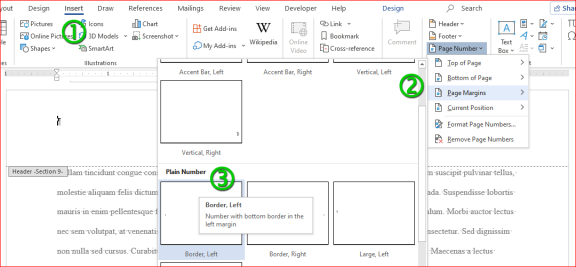
Step 6) Format the new page numbers.
Your page numbers are now in place, however there is some further formatting to adjust.
-
The automatic bottom border needs to be removed…
Select the page number itself. It will be contained within a text box. With the contents of the text box selected, go to Home tab > Paragraph group > Borders control > No border option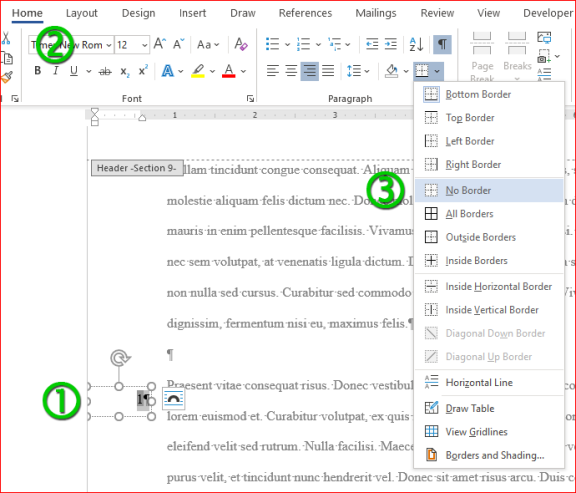
-
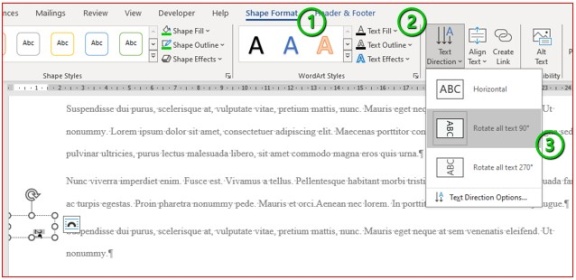
…and the page number itself needs to be rotated according to page orientation.
Shape Format ribbon menu > Text group > Text Direction control > Rotate all text 90° option
Continue working with your content.
Once you have completed all of these steps, you can continue working on the rest of your document. If you were to print and rotate the newly landscaped pages by 90° counter-clockwise, you would see that the page numbers are now in the same orientation as the rest of the document, which is in accordance with the regulations and guidelines outlined by the School of Graduate Studies.
Summary
- Create section breaks and un-link them from the preceding and following sections.
- Remove the page numbers, and rotate the page or section to landscape orientation.
- Re-insert your page numbers and adjust the formatting.
- Add, format, adjust, or modify your content (tables, charts, figures, graphics) accordingly, continuing to follow the boundaries of the page margins.