“How do I fix an image that won't go where I want it be? And how do I insert and format the captions for my tables and figures?”
Image Placement
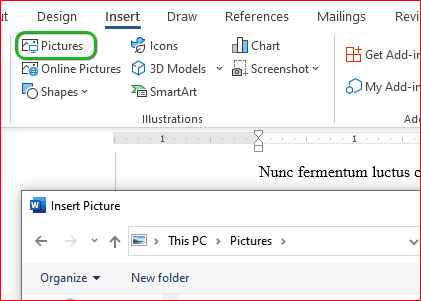
There are multiple ways in which an image can be placed and positioned in your document, but the most common way to insert an image into your document is outlined below.
Once your image is inserted into your document, you need to determine how it is positioned within the document. This will help determine why your image may appear to be out of place. The way to determine this is as follows:
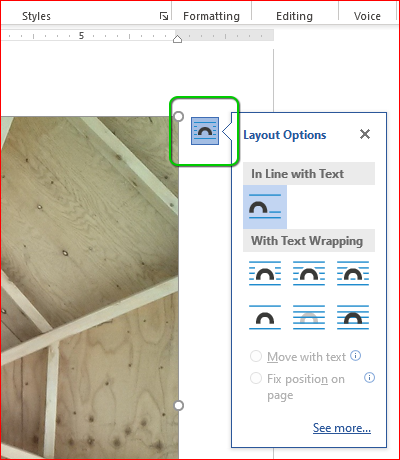
“In Line With Text”
By default, images are inserted at the location of the cursor, and they will be positioned In Line with Text.
This means that an image will have static placement on its own empty line, yet on the same layer, as the document text. Movement and repositioning of the image is restricted to the constraints of typical sentence and paragraph layout. This will keep your image in a static position within the margins on the page (independent of justification), yet allow it to sit between preceding and following lines of text (or perhaps other images).
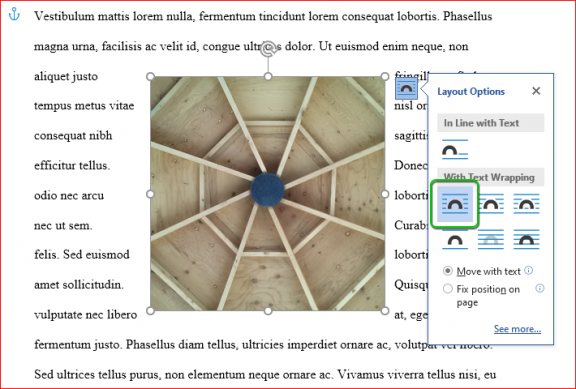
“With Text Wrapping”
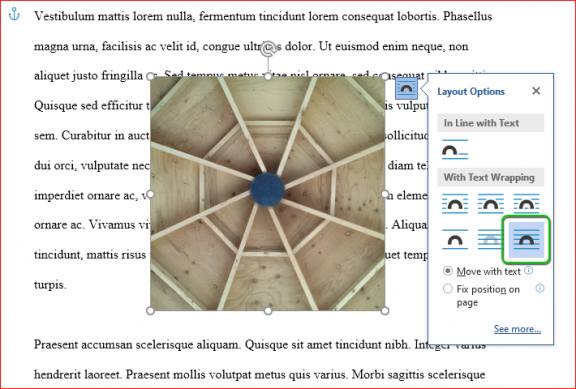
If the image is positioned With Text Wrapping this will afford three scenarios.
- The position and movement of the image is fluid, yet on the same layer as the text. The image can be dragged around the page while the text wraps around the image with varying degrees of proximity and spacing—i.e., the image “floats” inside and around the edges of a paragraph.
There are four options for controlling how the text wraps around the image: Square, Tight, Through, and Top and Bottom. The following example demonstrates the Square option.
- The image is placed on a separate layer from the text, but it is layered Behind Text, where the image will appear underneath the text.
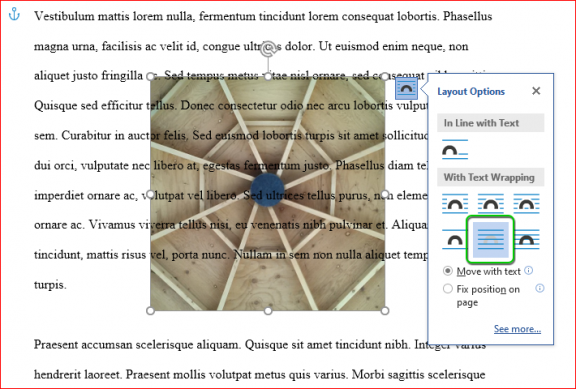
- The image is placed on a separate layer from the text, but it is layered In Front of Text, where it will shield and hide the text underneath it.
In scenarios 2 and 3, as the image is repositioned around the page, it does not interfere with the structure of the text itself. Effectively, the text does not actually “wrap” itself around any text because the image and the text are on separate layers from one another.
Adding Captions
The steps for adding captions to both figures and tables are almost identical, with only minor difference. Once your figure or table is in place, your image is ready for caption placement.
Figures
There are two ways to open the Add captions dialogue for figures.
- With the image selected, go to References tab > Captions group > Insert Caption function, or,
- Right-click the image itself, and chose Insert caption.

Tables
There are also two ways to open the Add captions dialogue for tables.
- With the table selected, go to References tab > Captions group > Insert Caption function, or,
- Right-click the cross-hair icon to the top-left of the table, and chose Insert caption.

Caption Configuration
From within the Add caption dialogue:
- Add text to the Caption field, including any separators (periods, dashes, colons) between the caption label and the caption text.
The text field for captions is limited to 255 characters (including spaces). If your caption is longer than that, you can always add text to your caption once it is in place.
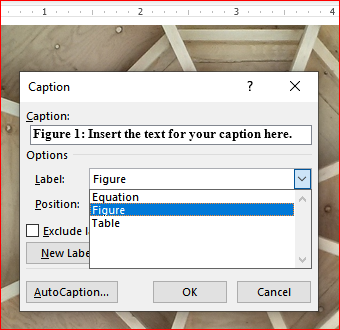
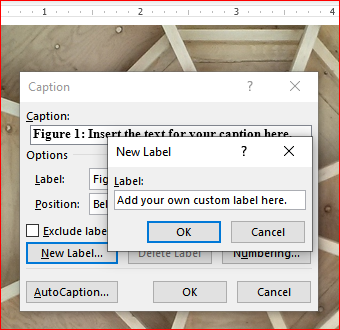
- Choose the appropriate Label from the drop down menu: Figure, Equation, or Table. If none of these options fit the caption you wish to add, you can create your own via the New Label… button.
Typically, captions are positioned below figures (and any other images) and above tables and equations.
Chapter-by-Chapter Numeration of Captions
By default, captions are numerated in chronological sequence throughout a document, independent of any pagination and sections. However, captions are sometimes required to be chronologically numbered according to chapters and sub-chapters. For example, instead of Figure 1, Figure 2, Figure 3, etc., you may need to caption your figures Figure 1.1, Figure 1.2, Figure 3.1, Figure 4.1, Figure 4.2, etc.
Out of the box, adding captions in MS Word does not afford this, however, with some extra configuration, you can format your document so that your chapter headings will allow your captions to be numbered according to the chapter in which they are located. You can achieve this by setting up a multilevel list and linking it to your chapter headings. A multilevel list is simply a list that has other lists nested inside of it, whether they are other numbered lists or bulleted lists.
Setting up a Multilevel List
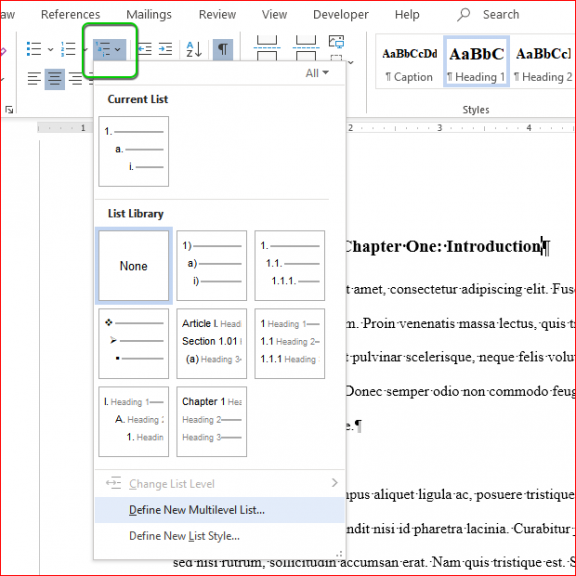
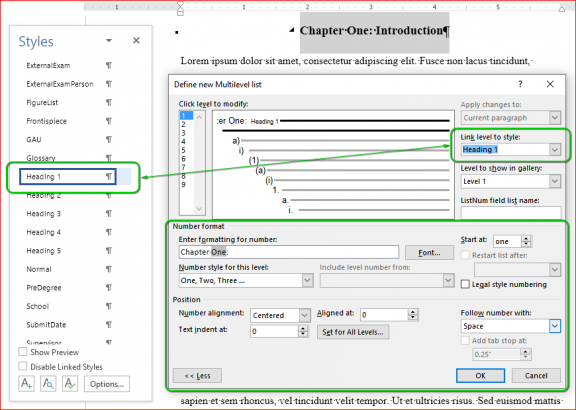
With the first chapter heading selected (or your cursor positioned inside the heading), you can define a new multilevel list via the multilevel list menu on the Home tab.
The Define new Multilevel list window will then appear. It is in this window where you control the numbering system and formatting for each level of your multilevel list (Number format section in the lower half) and also where you link each level in your multilevel list to one of several specific formatting styles for chapter and sub-chapter headings (Link level to style dropdown menu). You'll need to modify one list level for each distinct level of chapter and sub-chapter used in your document, for example, list level 1 for chapter 1 (1.), list level 2 for first level of sub-chapters (1.1.), list level 3 for second level of sub-chapters (1.1.1.), etc.
Applying the Numeration to your Captions
Once each required list level is configured and linked to the corresponding heading style (press OK to save your list!), then you can apply the heading styles (Heading 1, Heading 2, Heading 3, etc.) to each the chapter and sub-chapter heading in the text. Applying these formatting styles to your chapter and sub-chapter titles will then connect these list levels to each chapter and sub-chapter section and allow any figures or tables to be labelled with a caption whose numeration indicates specifically within what chapter and sub-chapter it is contained.
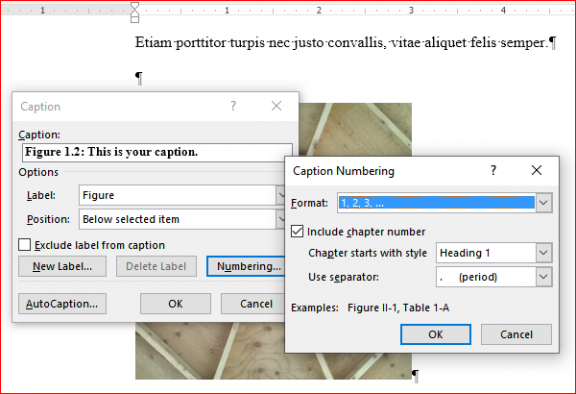
As you create your captions throughout your document, you'll need to apply numbering to your captions via the Numbering… control found in the Caption dialogue. Ensure the Include chapter number option is checked off and configure your caption numbering in the Caption Numbering dialogue.
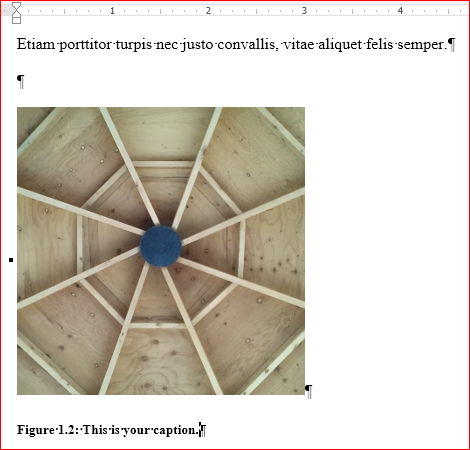
Once the configuration and application of your caption is complete, your caption should indicate in what chapter and in what position within a sequential order it is located. The following example indicates this figure is the second figure in the first chapter.
Summary
- Check the positioning and layout of the image in question, adding additional images (or tables) where required.
- Insert and format your captions, and depending on the type of graphic, use the appropriate label and position for the caption itself.
- Some numbering conventions for figures and tables require adding multilevel numbered lists to chapter heading styles in order to properly numerate the captions.