Using the 3D Scanner Software
Follow the instructions below to open and use the 3D scanning software to create your 3D scan.
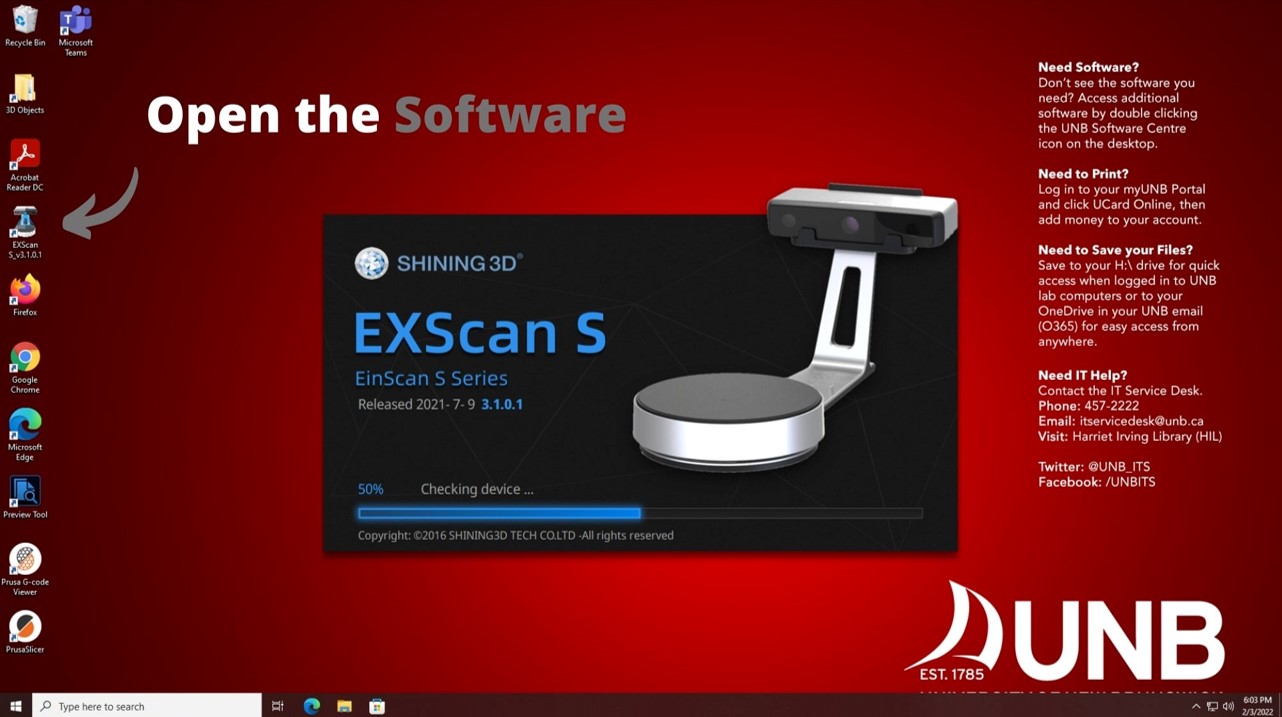
1. Open the software from the desktop icon
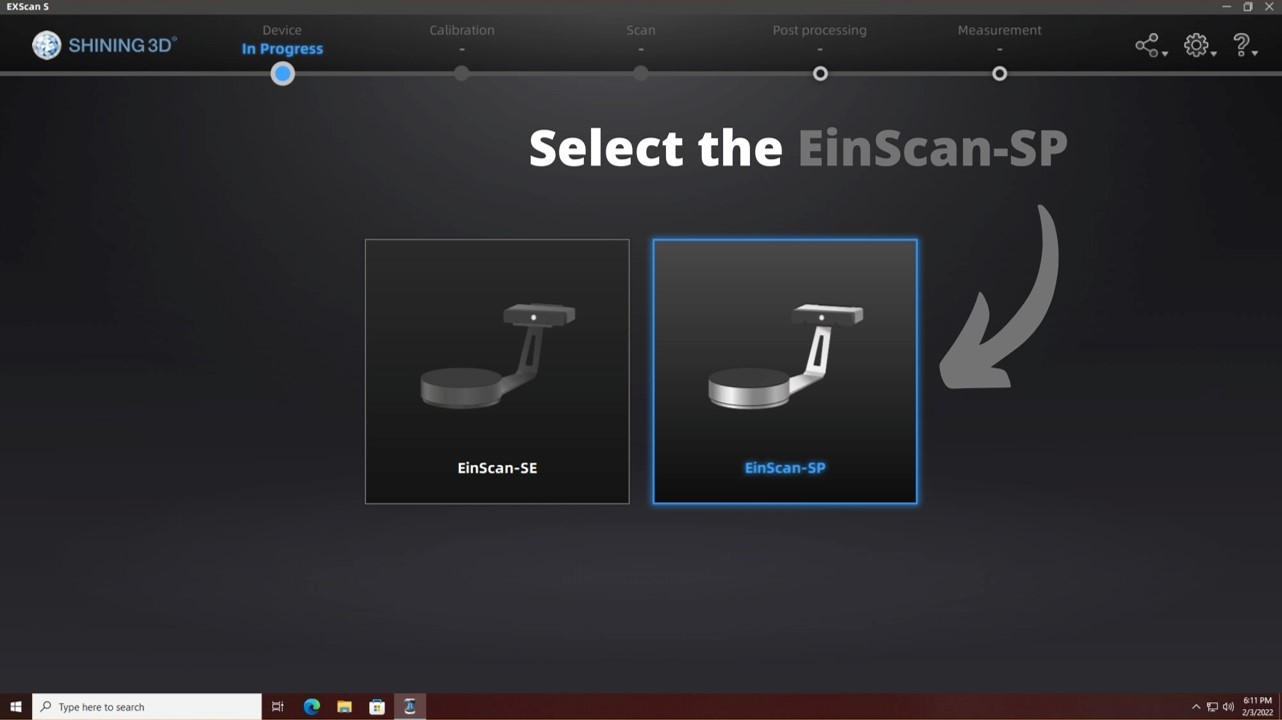
2. Select the correct scanner that you will be using (Note: it is always EinScan-SP)
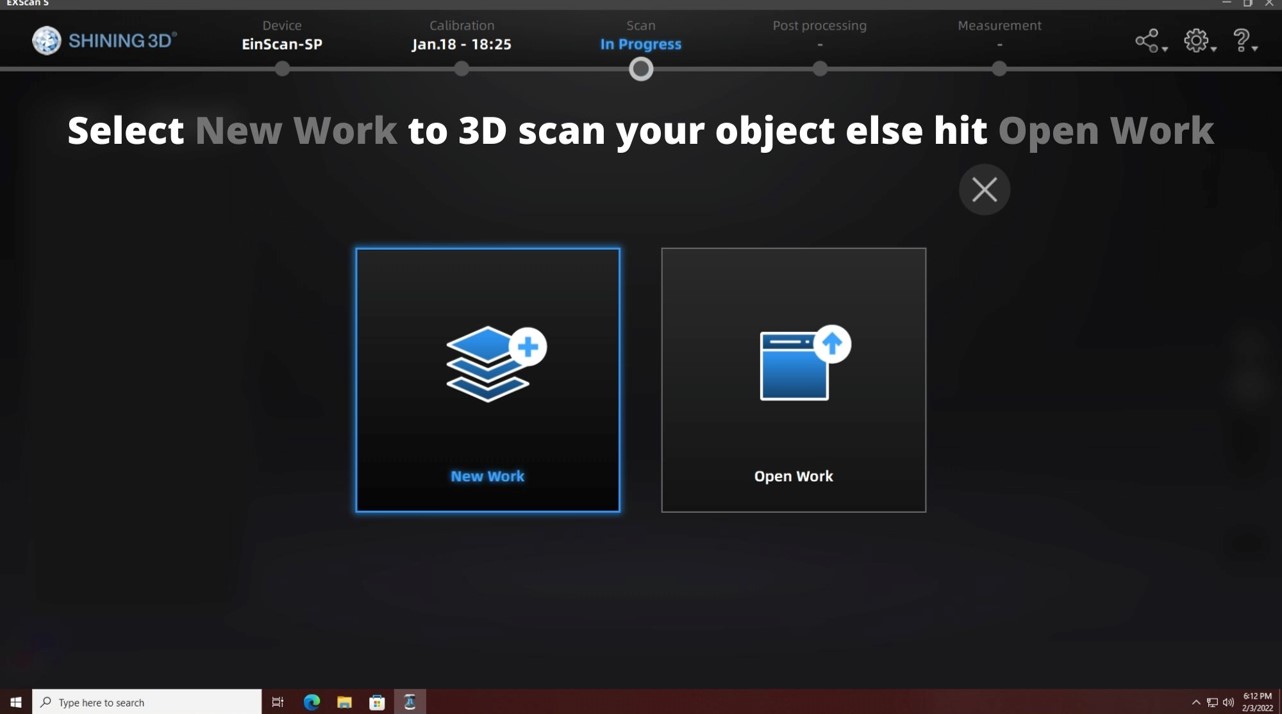
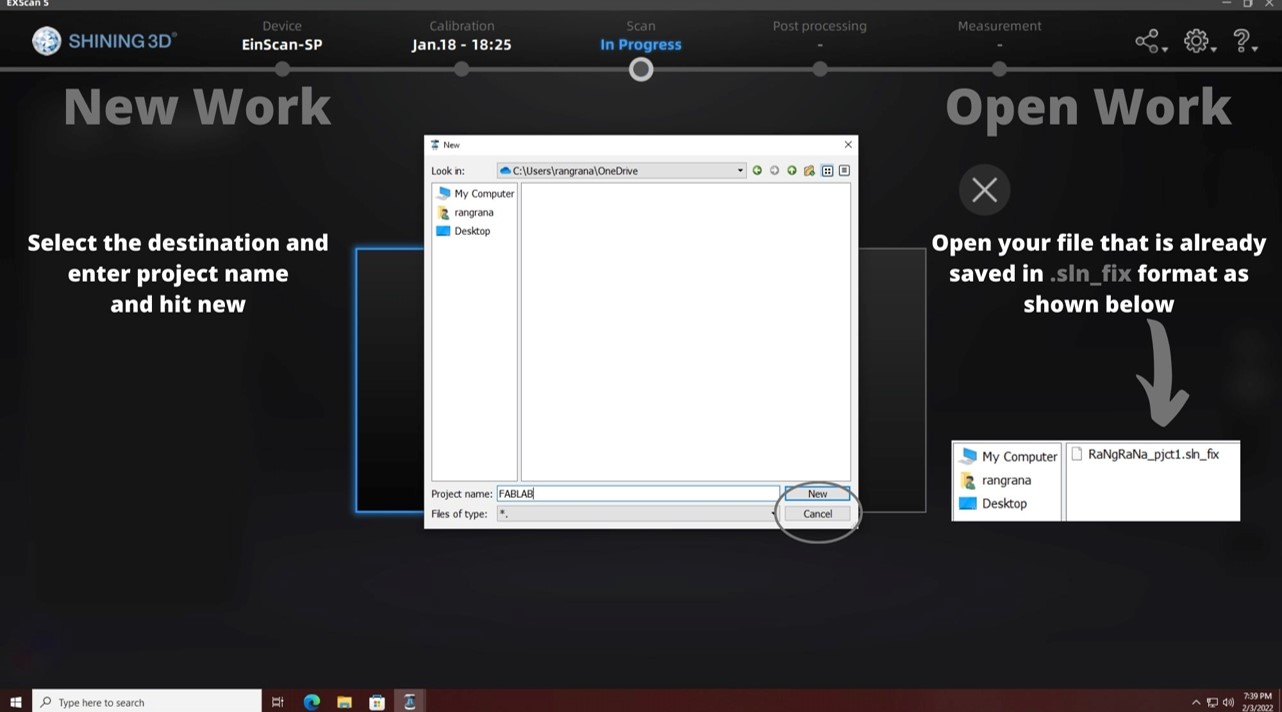
3. You can either select "New Work" if you are creating a scan for the first time, or "Open Work" if you are continuing to work on a previously created scan. You can then choose the location to save your file into.
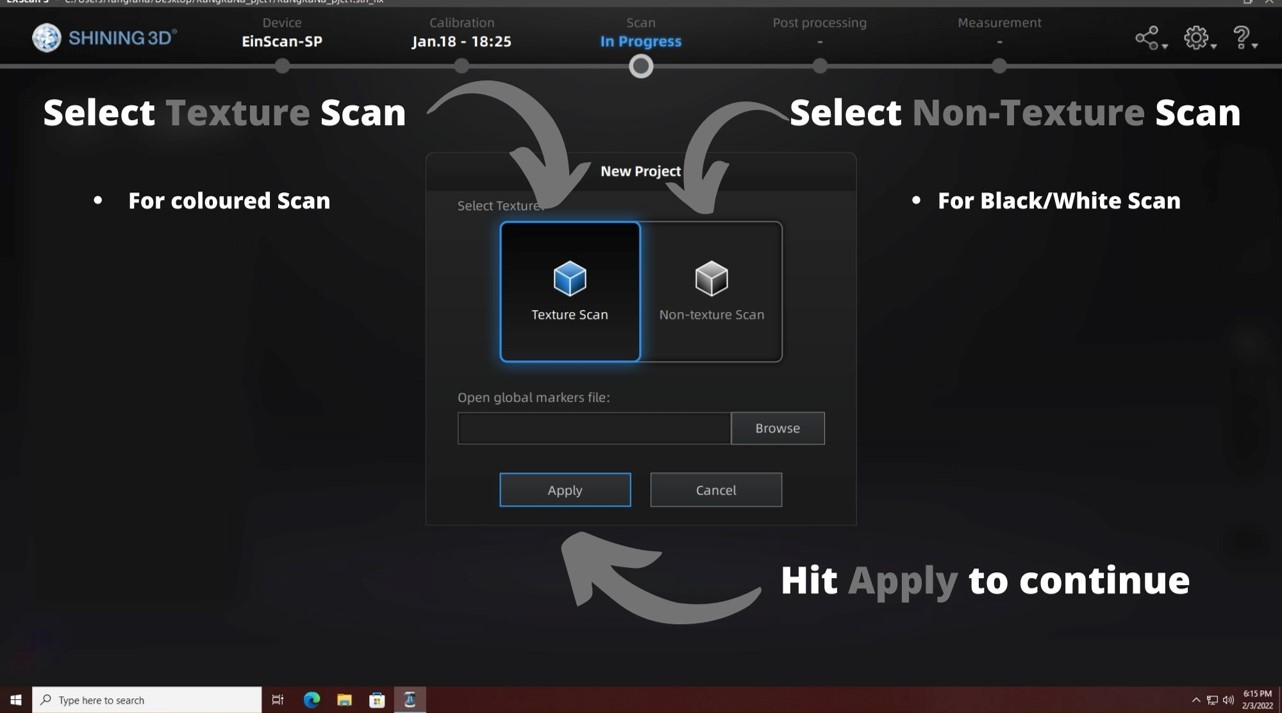
4. Select textured or non-textured scan based on the colour of your object
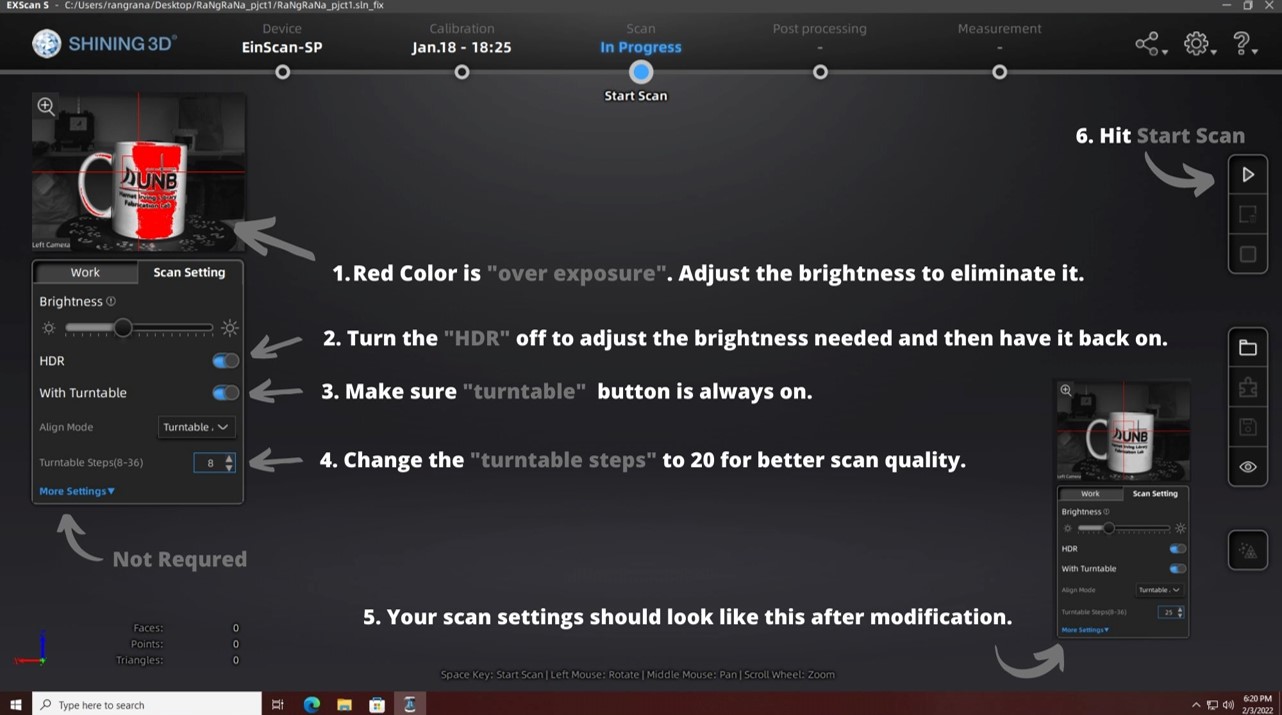
5. You can then place your object onto the turntable (ensure that the object is less then 10lbs and fits within the camera screen. Note: You can detach the camera on the scanner and connect it to the available tripod, this will allow you to scan objects that are taller/larger.
Once you have placed your object, you can adjust the various settings to take the best quality scan.
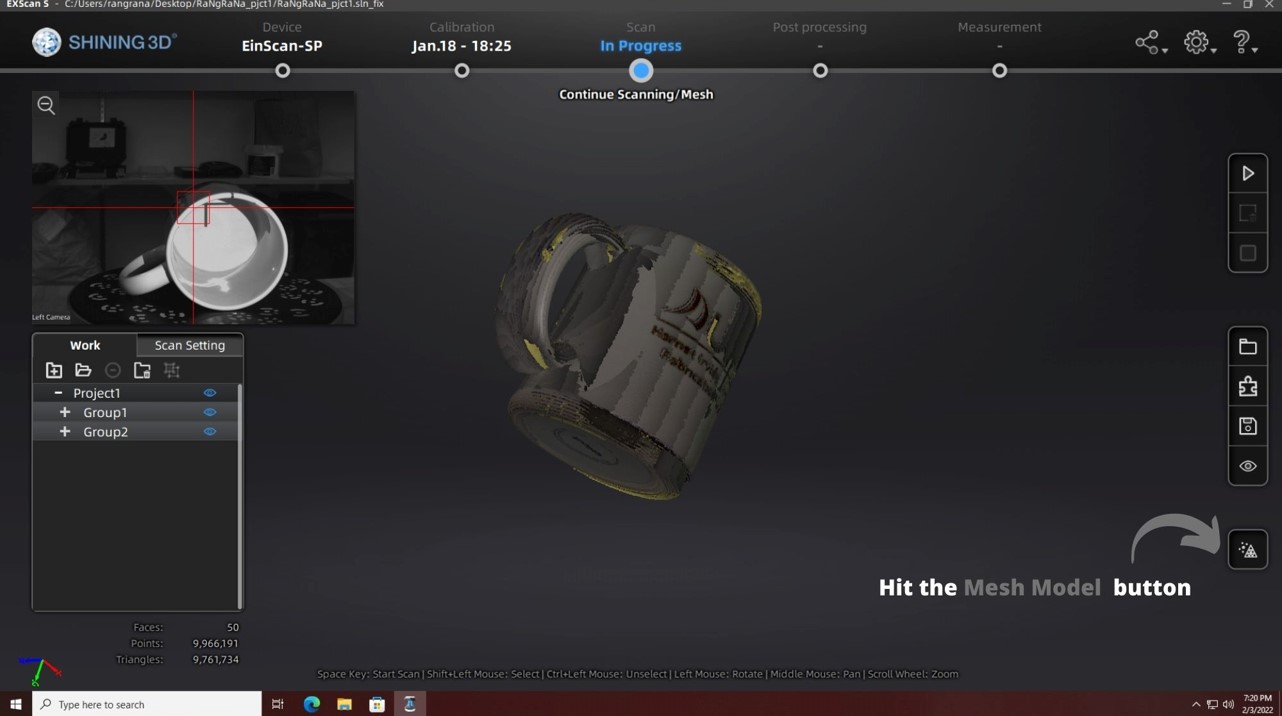
6. Once the scan is completed, make sure you are happy with the scan and determine whether you will try again or continue to the editing phase.

7. If you need to fill in a hollow area, re-position the object and continue scanning.
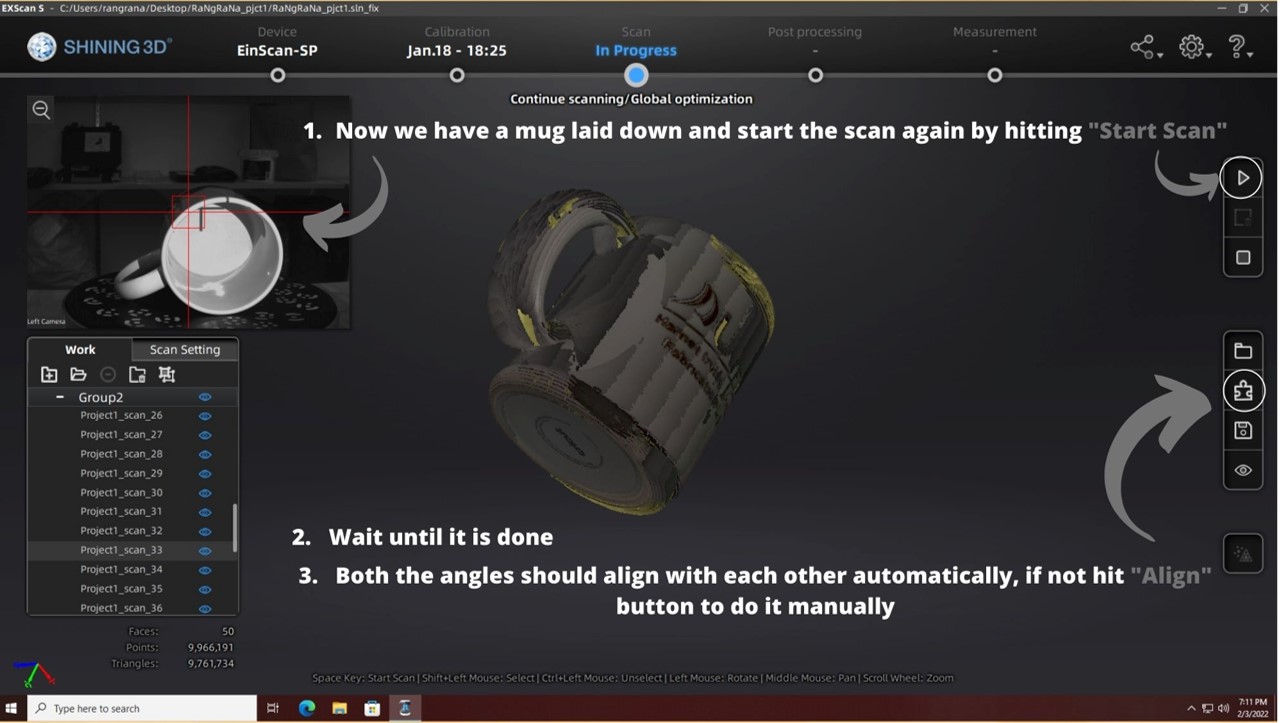
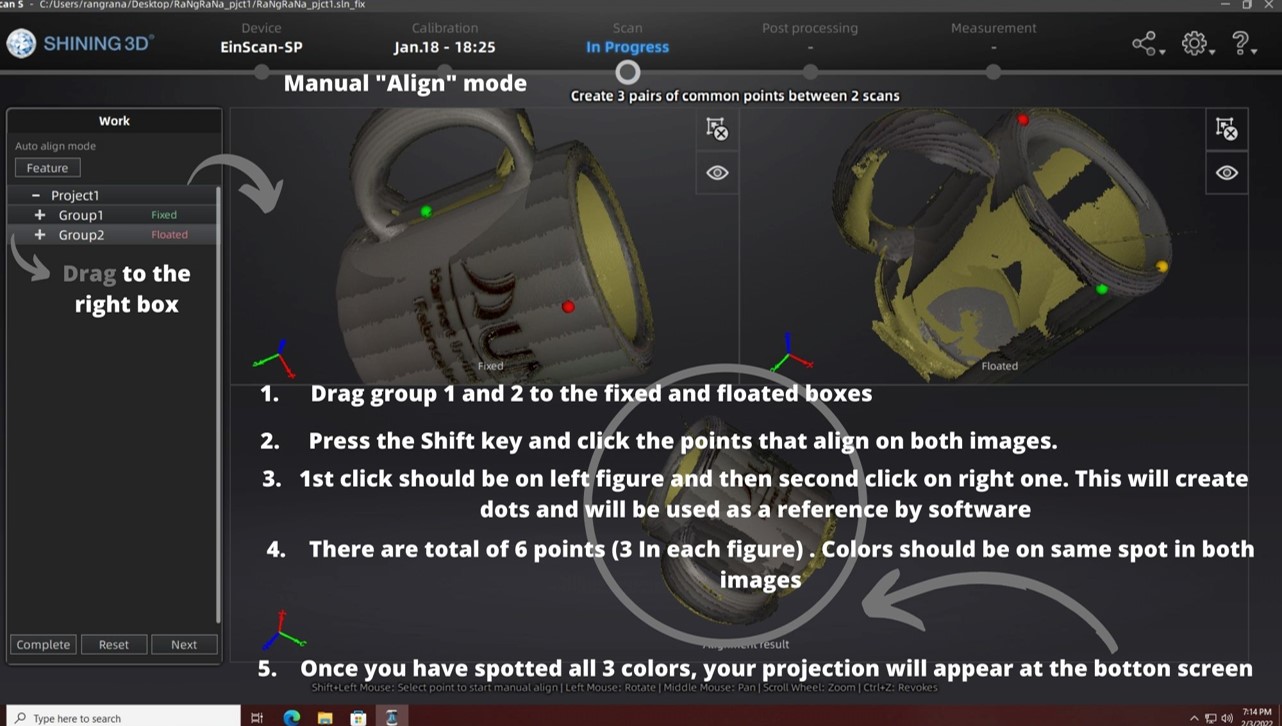
8. Align the two scans to fill-in any missing areas.
9. You should have a completed scan. Once you are happy with the results, click "Mesh Model"
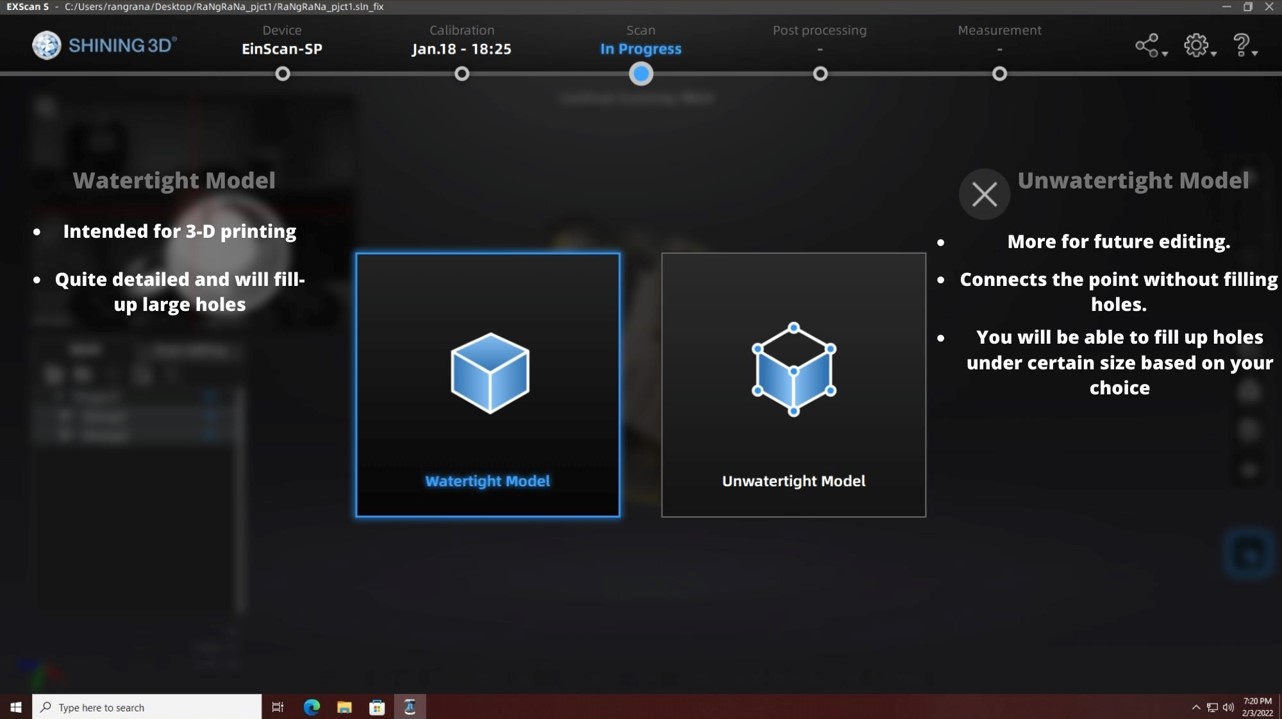
10. Decide whether you would like a watertight model or an un-watertight model. This will depend on your intent for future use of the scan.
11. Your scan should be complete, ensure that you save your scan and you can add the scan to the Fabrication Lab SketchFab account.